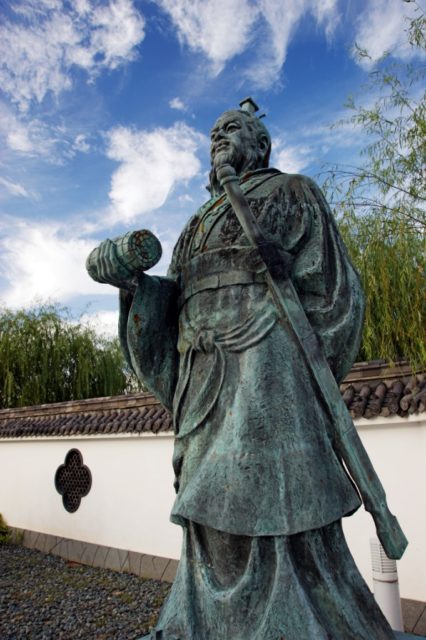
Sun
Tzu (544-496 BC) was a general who wrote the “Art of War” – a book on
military strategy that’s still required reading for all students of
Chinese literature. “If your enemy has the advantage, bait them,” he
wrote. And one of the ways to do this is to “appear where you are not
expected.”
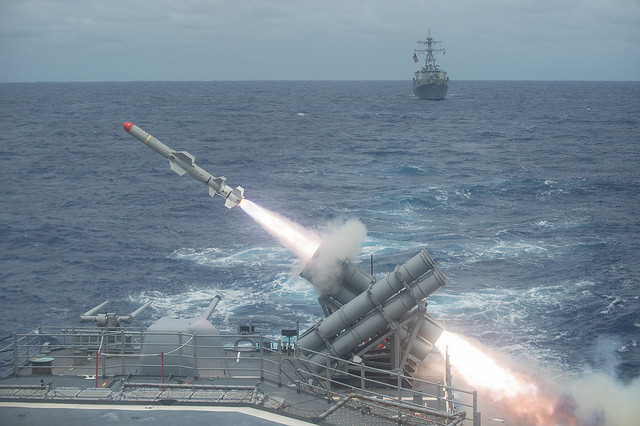
In 2006, that’s exactly what the Chinese did. Right in the middle of a joint US-Japanese naval exercise. Harpoon
anti-ship missile launched from the guided-missile cruiser USS Shiloh
(CG 67) during a live-fire exercise off the coast of Japan.The
first time was an accident, however. In September 1994, the US Pacific
Fleet reported seeing a Chinese submarine in international waters, but
nothing came of it. At least till the following month.
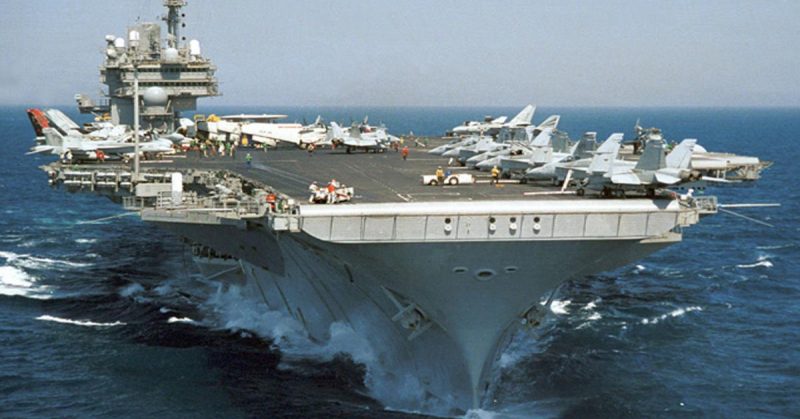
On October 27th, the USS Kitty Hawk,
an aircraft carrier, was passing through the Yellow Sea in
international waters when they detected something in their sonar. To
track the object, they deployed anti-submarine warfare planes which
dropped sonic devices into the sea.
It turned out to be a Chinese
Han-class nuclear-powered attack submarine (SNN). During the Cold War,
the US and the USSR had established a protocol for such encounters to
avoid conflict. Unfortunately, no such protocol existed between the US
and China. Statue of Sun Tzu in Japan. Photo CreditOn October 28th, the Chinese scrambled jet fighters to the area, making passes over the Kitty Hawk,
while Beijing threatened shoot-to-kill orders. By October 29th, the US
was told that the sub wasn’t stalking their aircraft carrier. It was
simply trying to get back to its base in the port of Qingdao.
The matter settled, the Kitty Hawk left the area, but it showed just how far Chinese technology had come. The Chinese thought so, too.
Which
is why on July 21st, 1995 they began conducting missile tests off
Taiwan, resulting in the Third Taiwan Strait Crisis. US intervention
ended it the following year, but it made the Chinese leadership realize
just how inadequate their technology was.
Then on April 16th, 2003 the Great Wall #61 (a
Ming-class diesel submarine) suffered engine failure and used up all
its oxygen, killing the entire crew. That was not the first time China
had lost a submarine, but it was the first time they admitted it on
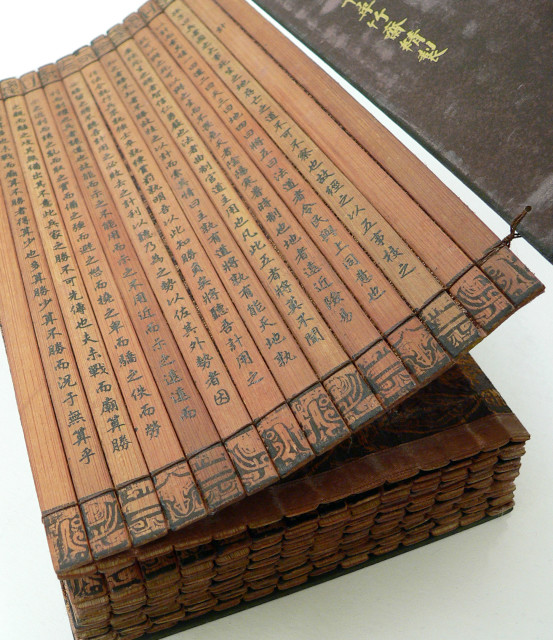
national TV. A
copy of Sun Tzu’s “Art of War,” commissioned by the Qianlong Emperor,
now displayed at the University of California, Riverside. Photo CreditThe US heaved a sigh of relief, but not because of the deaths. There had been other unconfirmed Chinese losses, but the Great Wall snafu confirmed what they knew about the state of Chinese technology.
But
China was learning. According to Sun Tzu, “The factors in war are:
first, measurement; second, quantity; third, calculation; fourth,
comparison; and fifth, victory.”[4:14] Compared to Russia, China was
technologically backward, which is why they relied on greater numbers.
When
the US officially terminated diplomatic ties with Taiwan in favor of
China in 1979, the People’s Liberation Army Navy (PLAN) calculated that
they could terrify Taiwan in 1995. At least until US intervention showed
them otherwise. So they resorted to comparison.
PLAN strategists
came to the conclusion that the basis of America’s power lay in its
aircraft carriers. Following Sun Tzu’s logic, what made one strong was
also the very thing that made one weak. And while America was
strong, China would never have control over its own waters. The
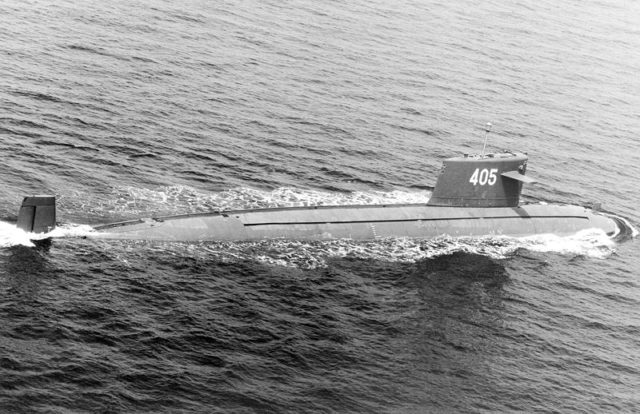
solution? “Attack what he values most.”[11:70] The Chinese Navy Han class nuclear-powered attack submarine No. 405. Photo CreditSince
the US only had 11 such carriers, PLAN decided to focus on submarine
development and anti-carrier military exercises. The thinking was that
in the event of war, America couldn’t afford to lose even one. So they
bought Kilo-class submarines from Russia and began building new ones of
their own.
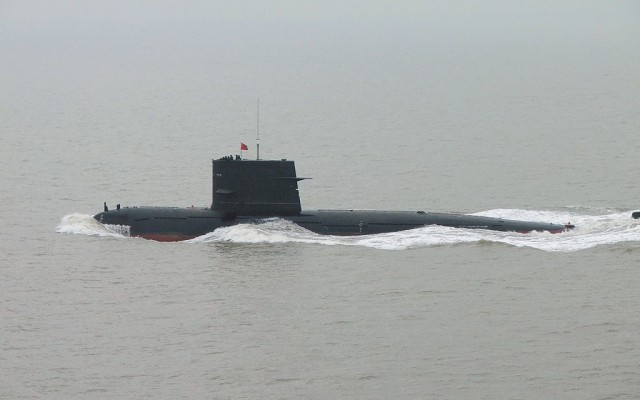
In 2004, Chinese submarines began making reconnaissance
missions further away from their coastal waters. In November, a Type
09-1 Han Class attack submarine traveled all the way to Guam, circled
the island, then surfaced in Japanese territorial waters on November
10th where they were spotted.
International law requires tracked
submarines to surface and identify themselves, but the submarine did
not. It was followed by helicopters for two hours before returning to
China.
Japan raised a ruckus over the incident, so China
apologized seven days later, claiming it was due to a technical error.
Chinese newspapers hailed it as a victory, however, citing Japan’s human
rights abuses during WWII.
Ever since that war, ethnic Chinese
(not just those from the People’s Republic of China) have had a
love-hate relationship with the Japanese. To the surprise of the PRC,
some Chinese newspapers around the world lauded the incident. Chinese Type 0-91 Han Class Submarine.It
wasn’t because they supported the PRC. It was because they enjoyed
seeing the Japanese panic. Even some South Korean papers had a good
laugh because of their equally ambivalent relationship with Japan.
The
incident taught the PLAN the value of counting coup. It also proved Sun
Tzu’s other maxim that “it is enough to consolidate your strength,
calculate the enemy, and get support from your men.”[9:41]
By 2006, China was ready to test another one of Sun Tzu’s claims – “Provoke him to know his patterns of movement.”[6:27]
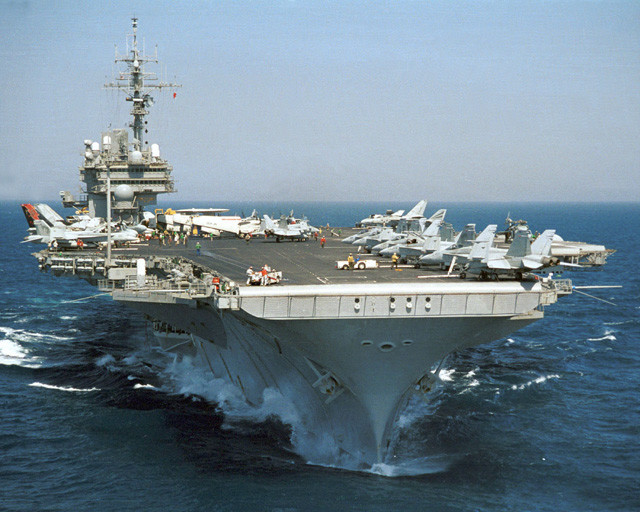
On October 26th, the USS Kitty Hawk was
undergoing a training exercise near Okinawa, Japan. She was trailed by
escort ships meant to protect her from submarine attack, when that’s
exactly what happened.
OK, the carrier wasn’t attacked,
but a Song-class Chinese submarine breached the surface within five
miles of it – well within range for a missile strike. And none of the
escort ships noticed it till it surfaced.
The exact details remain
scarce, but NATO officials confirmed that it disturbed those at the
Pentagon. Some military experts claim, however, that unless one is
actually looking for submarines, they’re very hard to detect. The USS Kitty Hawk.Chinese
officials deny the incident happened. While some suggest that it was an
accident, others argue that Chinese officers don’t have the leeway to
act independently. Meaning the thing surfaced where it did because it
was ordered to.
Its timing was also crucial. Admiral William
Joseph Fallon, the commander of the US Pacific Command, was headed to
Asia for a 23-nation defense meeting which China declined to join.
Admiral Gary Roughead, on the other hand, was in China preparing for the first joint Sino-US naval exercise.
In
2014, China began claiming islands close to several South East Asian
nations, including the Philippines, which the US pulled out of in 1992.
The US responded by signing the Enhanced Defense Cooperation Agreement
(EDCA) with the Philippines in April, granting them bases to operate
from.
Some, therefore, believe that a new (but undeclared) Cold
War has begun. If so, then the PLAN is taking another quote from Sun
Tzu, which states that ”two sides remain in a standoff for many years in
order to do battle for a decisive victory on a single day.”[13:03]
Stay tuned.
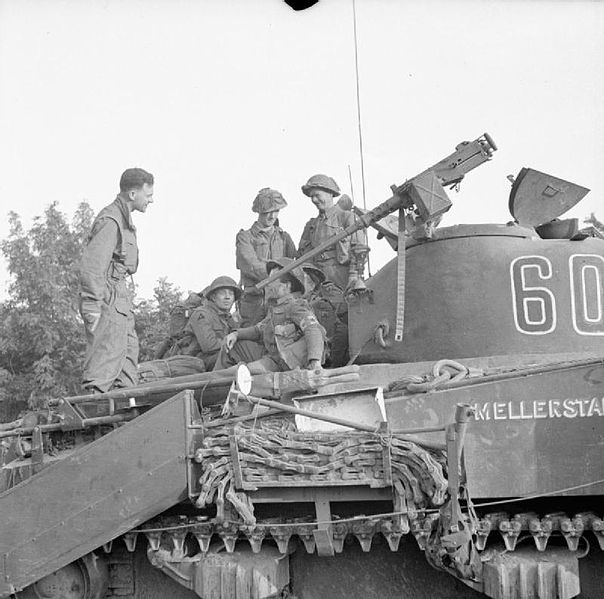
The British Army’s Largest Tank Battle in 25 Stunning Images
Operation
Goodwood in Normandy, France was a British offensive against the German
forces at the end of July 1944. It is called by some historians as ‘the
largest tank battle in British Army’s history.’ British forces deployed
two infantry divisions and three armored divisions with 1,100 tanks.
The Germans engaged four infantry divisions, three armored divisions,
and two heavy tank battalions with 377 tanks. The British forces wanted
to take control of Caen in Northwestern France to break through the
German lines and liberate the rest of the occupied country.
The British forces advanced seven miles to the eastern part of the
city, but the Germans prevented a total breakthrough. The British had
3,474 casualties and lost 314 tanks. The Germans had an unknown number
of casualties but over 2,500 German soldiers were captured, and they
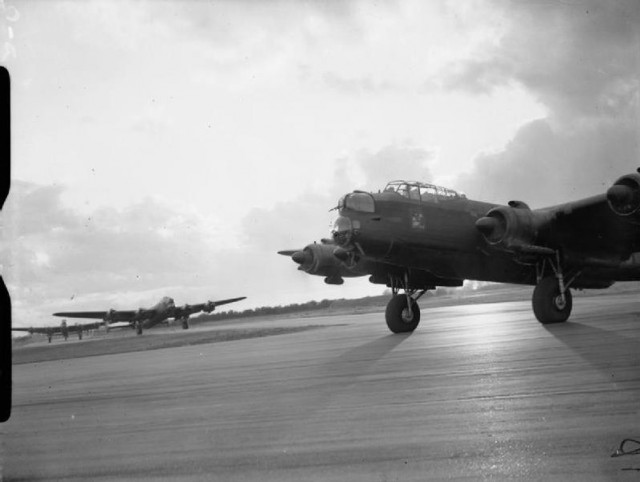
lost 75 to 100 tanks in the battle. Avro
Lancaster B Mark IIs of No. 514 Squadron RAF taxi onto the main runway
at Waterbeach, Cambridgeshire, for a daylight attack on fortified
villages east of Caen, in support of the Second Army’s armoured
offensive in the Normandy battle area (Operation GOODWOOD).Vertical
aerial photograph showing Handley Page Halifax B Mark III, LW127
‘HL-F’, of No. 429 Squadron RCAF, in flight over Mondeville, France,
after losing its entire starboard tailplane to bombs dropped by another
Halifax above it. LW127 was one of 942 aircraft of Bomber Command
dispatched to bomb German-held positions, in support of the Second Army
attack in the Normandy battle area (Operation GOODWOOD), on the morning
of July 18th, 1944. The crew managed to abandon the aircraft before it
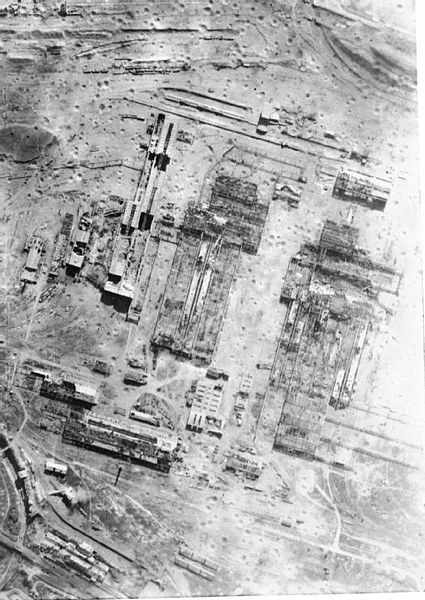
crashed in the target area.Vertical
photographic-reconnaissance aerial photograph of the steelworks at
Colombelles, east of Caen, France following a daylight attack on
fortified German positions by aircraft of Bomber Command on the morning
of July 18th, 1944, in support of Operation GOODWOOD. The whole target
area is studded with a dense concentration of craters and almost every
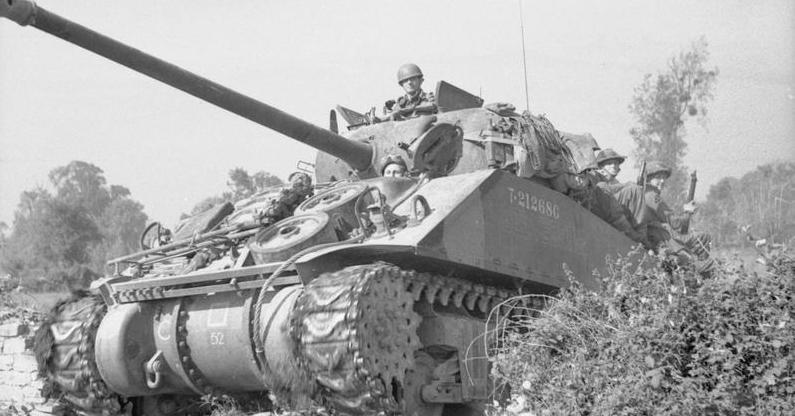
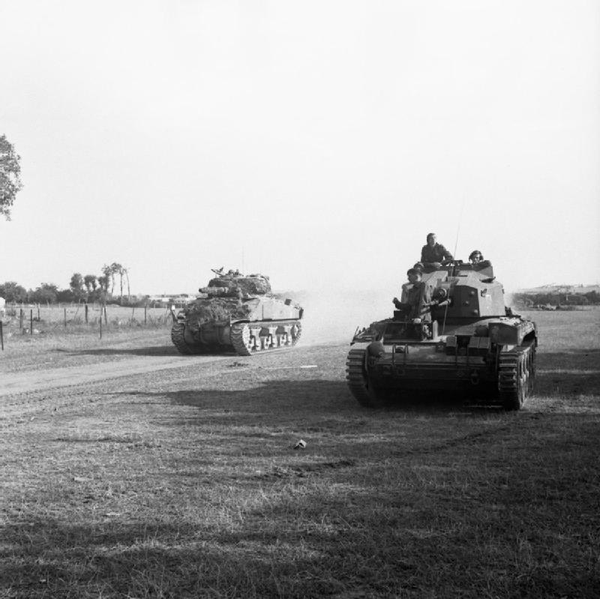
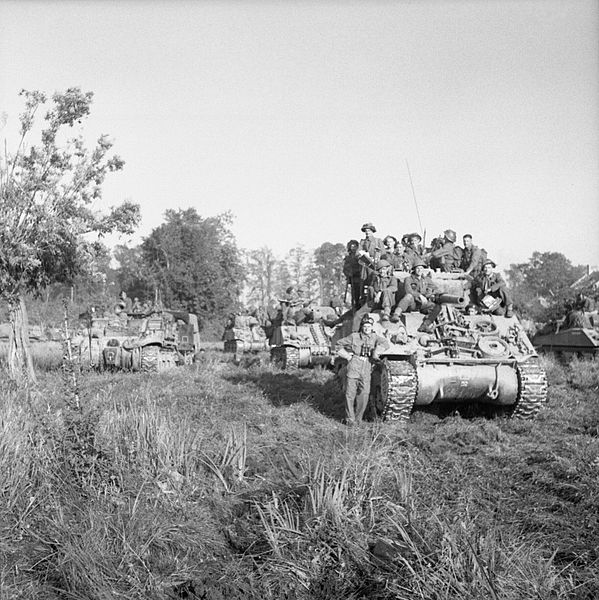
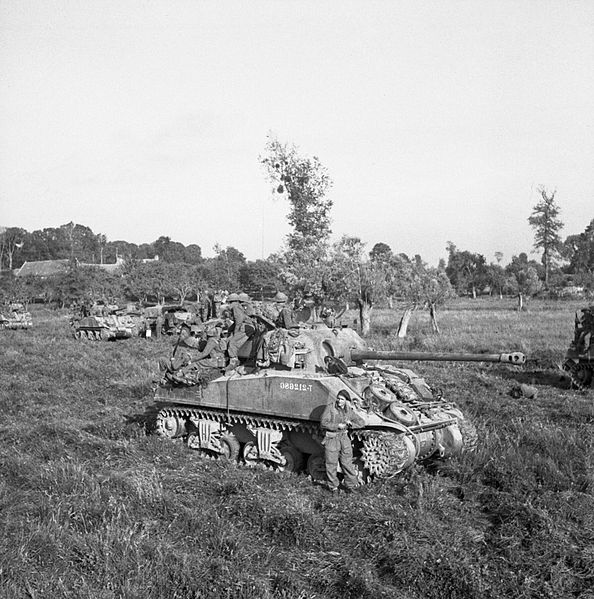
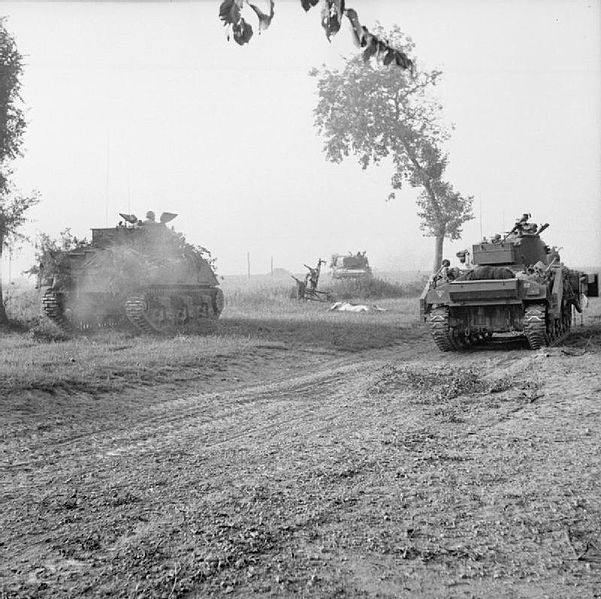
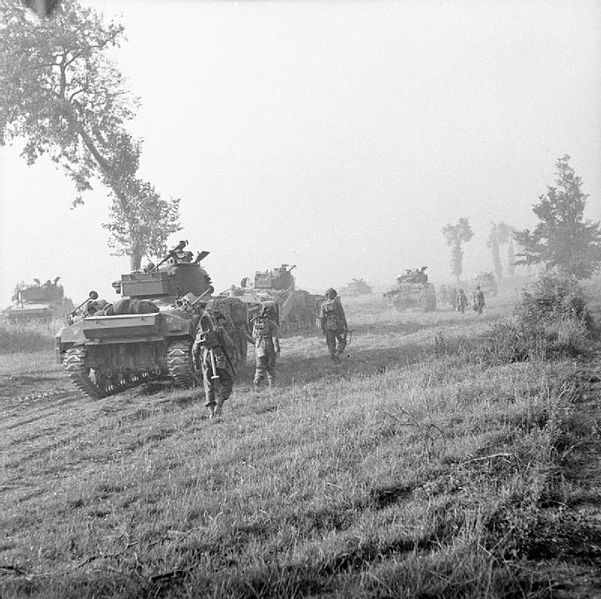
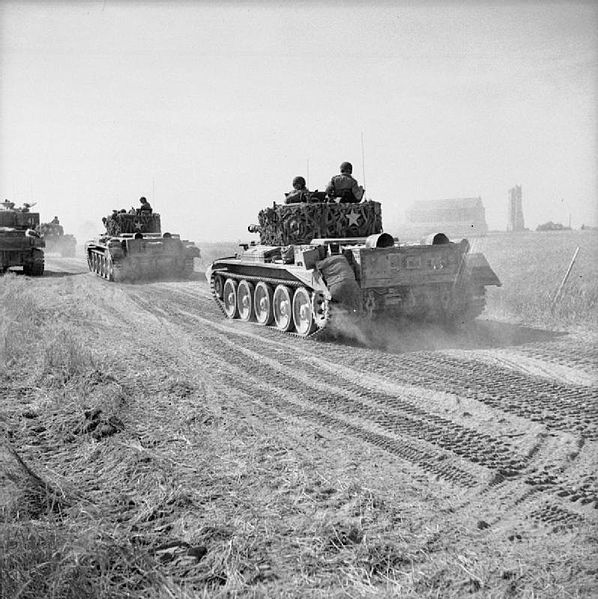
building in the steelworks has been destroyed.A Sherman tank and a Crusader AA Mk III tank of the Staffordshire Yeomanry in France during Operation Goodwood, July 1944Sherman tanks carrying infantry wait to advance at the start of Operation ‘Goodwood’, Normandy, 18 July 1944.Infantry
and Sherman tanks wait to advance at the start of Operation ‘Goodwood’,
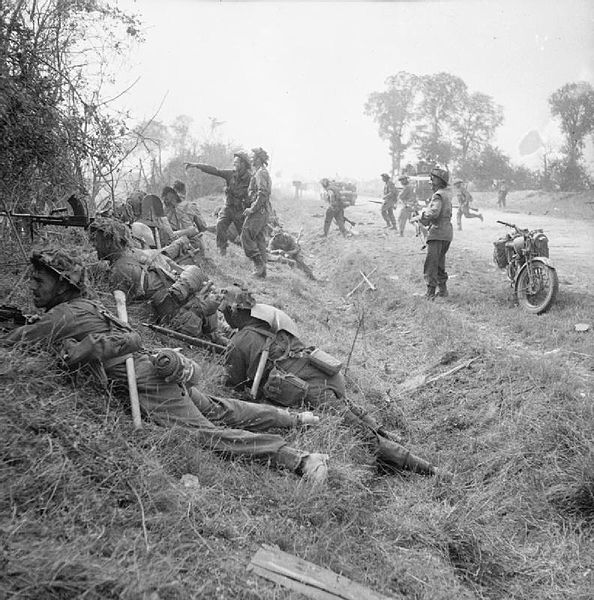
18th of July 1944. A Sherman Firefly is in the foreground.Soldiers of 1st Welsh Guards in action near Cagny during Operation GoodwoodSherman
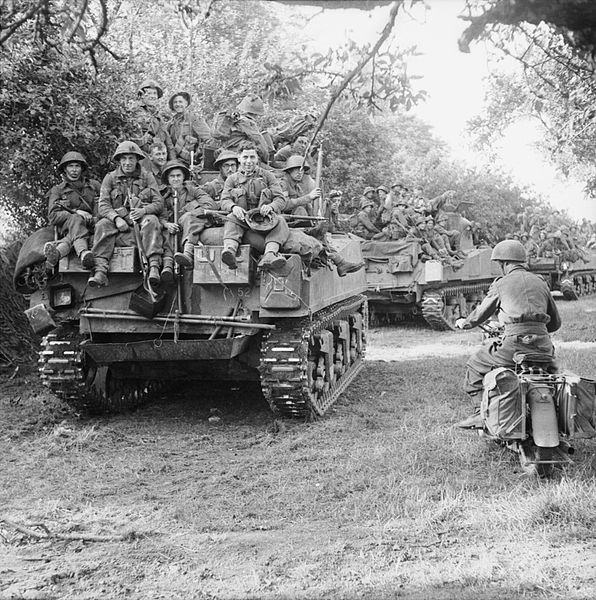
tanks of the Staffordshire Yeomanry, 27th Armoured Brigade, carrying
infantry from 3rd Division, move up at the start of Operation
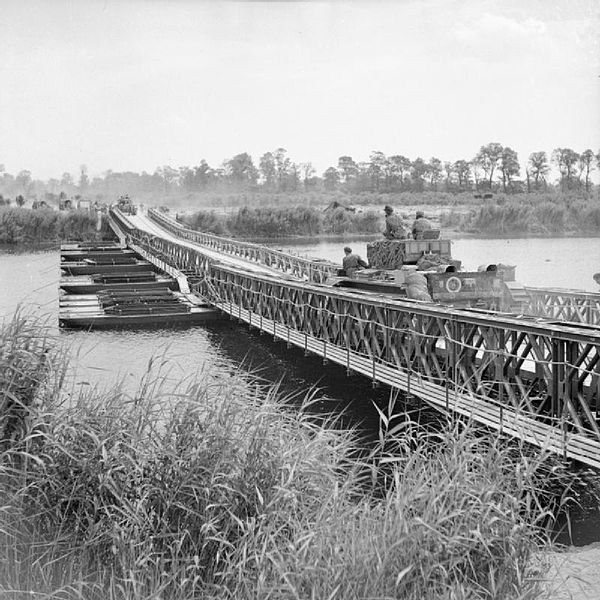
‘Goodwood’, 18 July 1944.Cromwell
tanks moving across ‘York’ bridge, a Bailey bridge over the Caen canal
and the Orne River, during Operation ‘Goodwood’, 18th July 1944.A
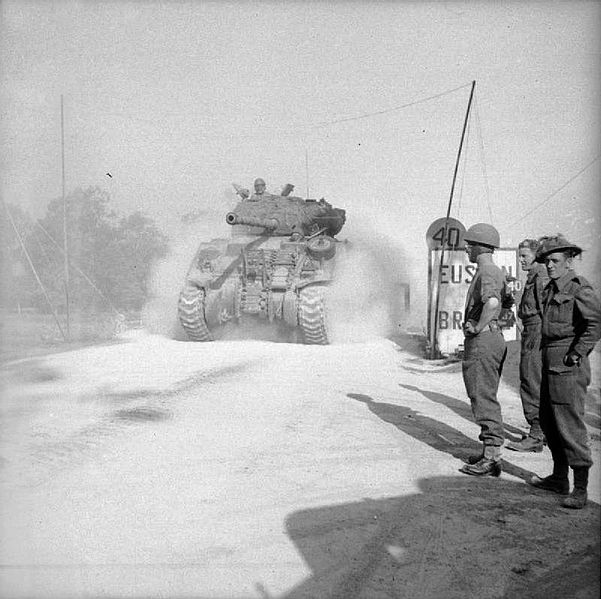
Sherman Firefly crosses ‘Euston Bridge’ over the Orne as it moves up to
the start line for Operation ‘Goodwood’, 18th July 1944.Infantry and tanks wait to advance at the start of Operation ‘Goodwood’.A
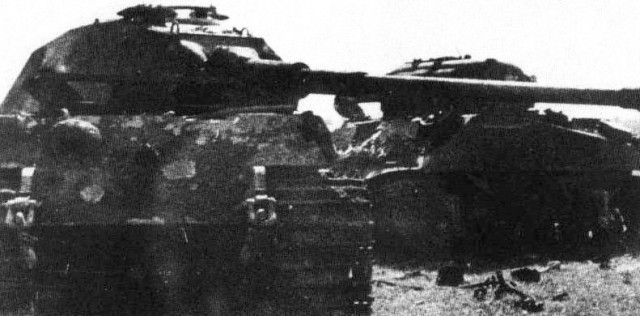
King Tiger of the 503rd heavy tank battalion, after it has been rammed
by a British Sherman commanded by Lieutenant John Gorman of the 2nd
Armoured Irish Guards, Guards Armoured Division during Operation
Goodwood. Gorman and his crew then captured most of the Tiger’s crew.
The event took place on 18th July 1944 to the west of Cagny, Normandy,
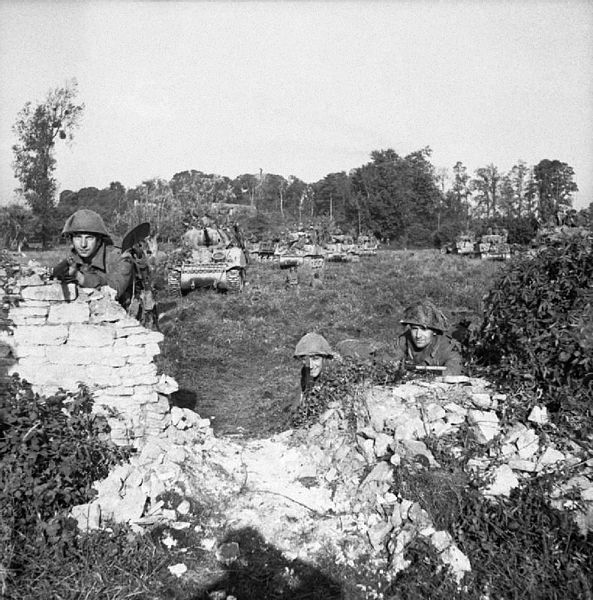
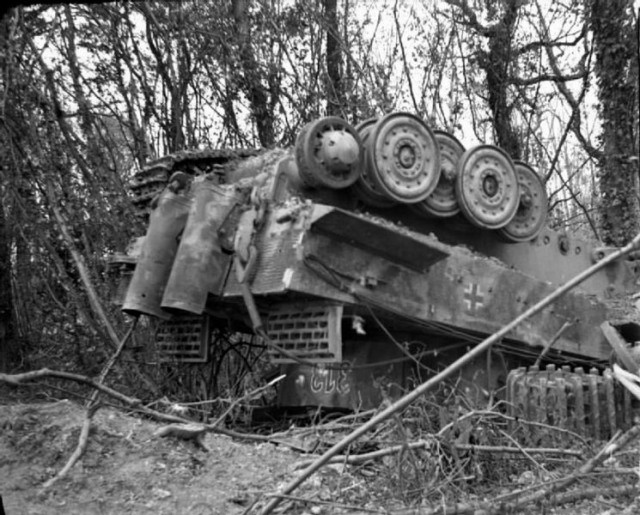
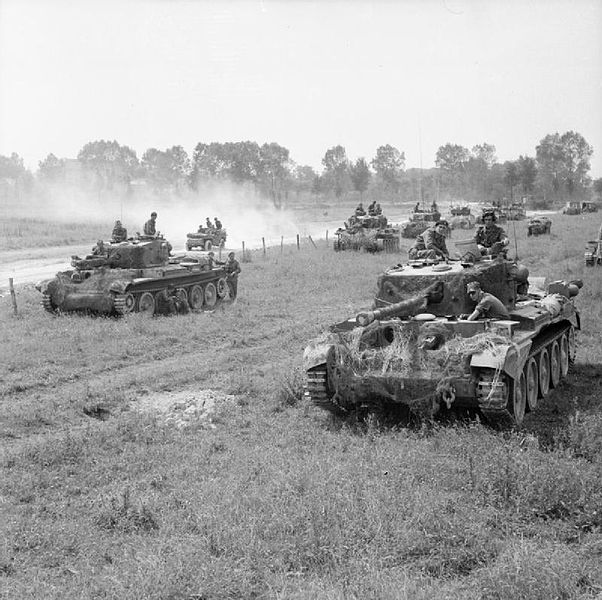
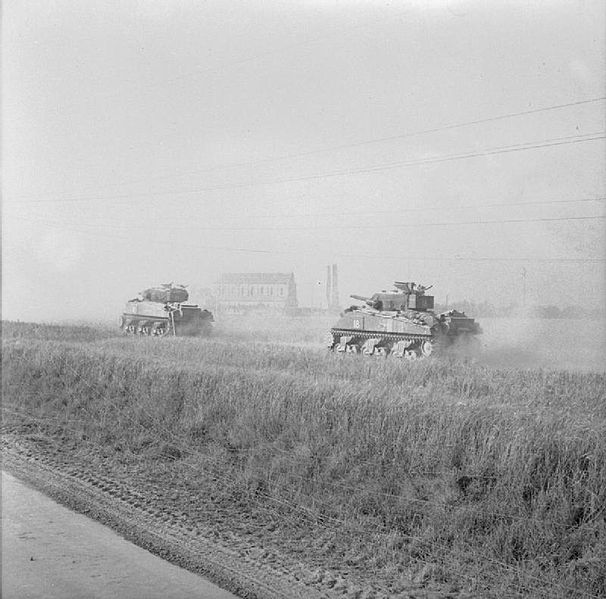
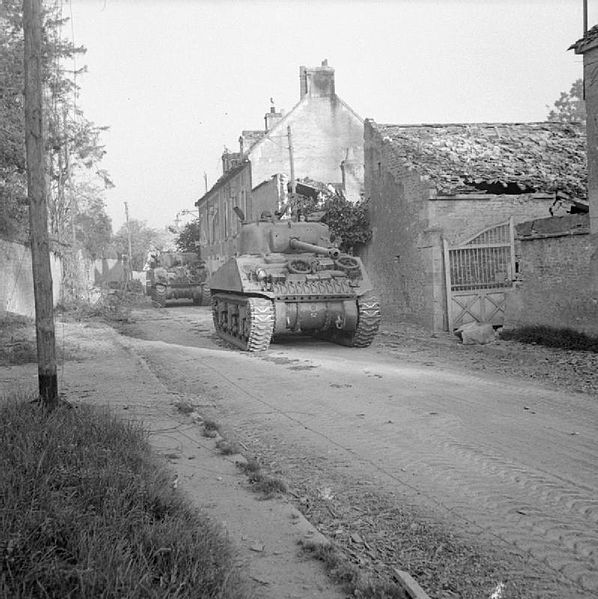
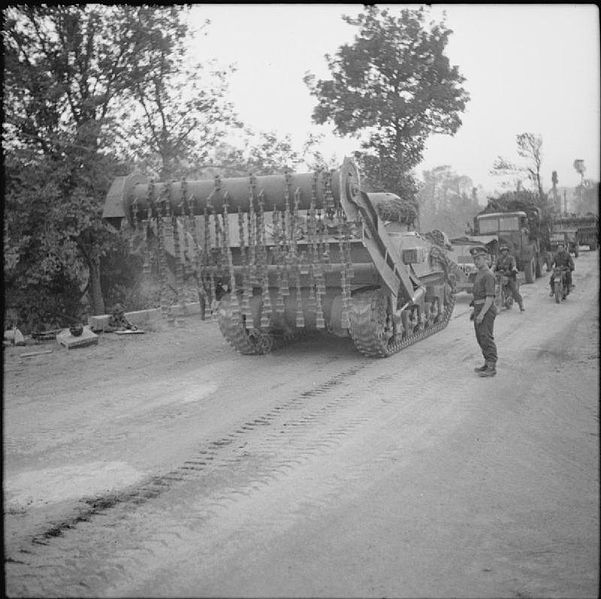
France.Loyd carriers and 6-pounder anti-tank guns of 3rd Irish Guards advance during Operation ‘Goodwood’, 18th July 1944.Sherman Crab flail tanks advance south of Escoville during Operation ‘Goodwood’, 18th July 1944.German PzKpfw VI Tiger tank overturned during the heavy Allied bombing at the beginning of Operation ‘Goodwood’, July 1944.Cromwell tanks assembled for Operation ‘Goodwood’, 18th July 1944.Sherman tanks and Crab flail tanks advance with infantry south of Escoville during Operation ‘Goodwood’, 18th July 1944.Cromwell tanks of 2nd Northamptonshire Yeomanry advance near Escoville during Operation ‘Goodwood’, 18th July 1944.Sherman
tanks of 23rd Hussars, 11th Armoured Division, make their way across
open ground in front of the factory chimneys at Colombelles steelworks
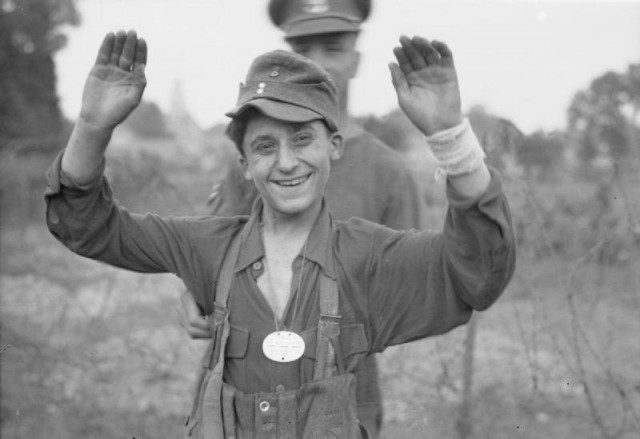
during Operation ‘Goodwood’, 18th July 1944.Sherman tanks and a Sherman Firefly move through Escoville during Operation ‘Goodwood’, 18th July 1944.Sherman flail tank moves up to cross the Orne river during Operation ‘Goodwood’, 18th July 1944.Smiling German Prisoner of War during Operation ‘Goodwood’, 18th July 1944.A tank commander talks to infantry on his Sherman Crab flail tank at the start of Operation ‘Goodwood’, 18th July 1944.
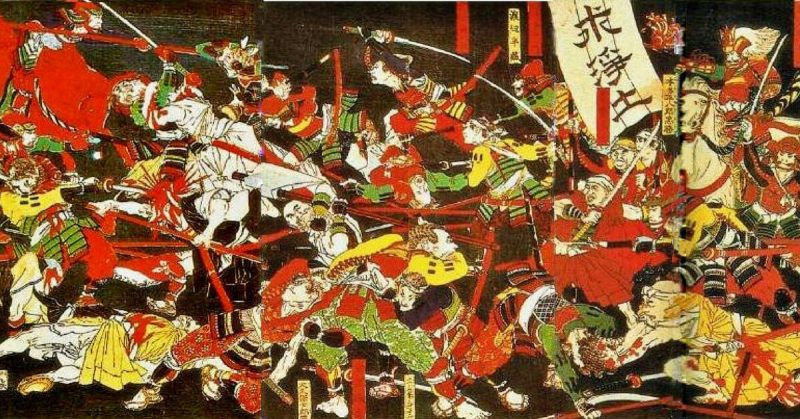
For hundreds of years, noble samurai warriors dominated warfare in Japan. Here are some of their most significant battles.
Ichi-no-Tani, 1184
In 1184, the Taira clan were resisting the growing power of the
Minamoto. The child emperor belonged to the Taira clan, but they were
less militarily strong than their opponents.
The general Minamoto Yoshitsune led his troops in a daring attack on a
Taira island base. While his forces attacked the palisades on two
sides, he led a hand-picked band of samurai down steep paths to the
rear. There they tried to cut off the defenders’ escape route.
The Taira kept their calm and fought bravely in hand-to-hand combat
in the shallow waters around their boats. Many died in individual last
stands, but most of the Taira escaped with the emperor.
Dan-no-Ura, 1185
The Minamoto finally pinned the Taira down the next year. A fierce
battle took place in the straights of Dan-no-Ura, samurai fighting each
other from ship to ship.
The Taira were utterly defeated. The emperor drowned, and a holy
relic was lost forever beneath the waves. Survivors took part in one of
the largest mass suicides in samurai history.
Third Battle of Uji, 1221
In 1221, the country was run by a regent on behalf of a weak Shogun.
The ex-emperor Go-Toba tried to regain control on behalf of his son,
rebelling against the officials who supposedly served him.
The rebellion ended on July 5. Go-Toba’s inexperienced and
intimidated army retreated to the Uji river. Although they inflicted
heavy casualties on their foes, they were defeated. The ex-emperor’s
rebellion was at an end.
Siege of Chihaya, 1333
A century later, another revolution tried to restore imperial
authority. It almost faltered following early defeats but was maintained
by Kusunoki Masashige, a samurai of intense loyalty and skill from an
obscure family.
Enemy forces surrounded the rebels in Chihaya Castle on Mount Kongo.
There, Kusunoki used the terrain and his knack for innovation to his
advantage. Enemy troops were lured into night attacks in narrow passes
and picked off. Boulders were dropped on them from clifftops. Pit traps
and felled trees obstructed their maneuvers.
Chihaya was never captured. Instead, it bogged down large forces in
trying to take it; becoming an inspiration and rallying point for rebels
fighting for the emperor.
Minatogawa, 1336
The Battle of Minatogawa was fought on the banks of the Minato River,
where Kusunoki Masashige took a stand against the Ashikaga army. With
the river at his back, he thought he had a strong defensive position.
For a while, the battle could have gone either way, but enemy seaborne
forces landed at his rear. A group of his supporters panicked and
withdrew, leaving his army exposed. He was defeated. Grave of Oda Nobunaga Grave located at Mt. Koya, Wakayama Prefecture, Japan.
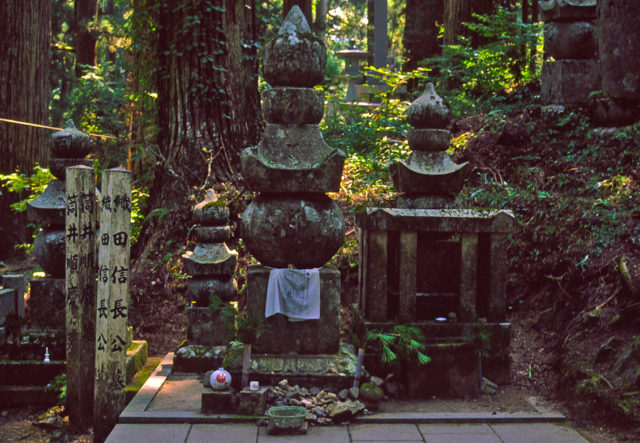
Anegawa, 1570
The warlord Oda Nobunaga began the reunification of Japan after a
period of intense violence and division. One of his most significant
victories came at Anegawa, where he faced the threat of the Asai and
Asakura clans.
Advancing from Kyoto, he threatened the fortress of Odani. The Asai
and Asakura were forced to face him in battle. Fighting across the
shallow Anegawa River, Nobunaga achieved a great victory with thousands
of his enemies slain. With those clans destroyed, he moved on to the
rest of Japan.
Nagashino, 1575
Another of Nobunaga’s victories, the Battle of Nagashino showed how the samurai declined as a fighting force.
Nobunaga, always ready to try new technology, embraced the power of
gunpowder weapons. He equipped 3,000 of his soldiers with arquebuses and
placed them behind field fortifications. When the samurai of the Takeda
clan charged his line, they were cut down in a hail of gunfire.
Nobunaga’s samurai then emerged to defeat the remnants at close
quarters.
Sendaigawa, 1587
His successor, Hideyoshi continued Nobunaga’s work. Sendaigawa was
the last major battle of Hideyoshi’s campaign against the Shimazu clan.
The battle was a highlight of the career of one of Hideyoshi’s best
generals, Kato Kiyomasa. He began life as the son of a blacksmith,
unlike most samurai who came from nobility. He fought valiantly in many
battles, proving that courage, skill, and leadership were about more
than breeding.
The Siege of Odawara, 1590
By 1590, only the Hojo clan held out against Hideyoshi. To finish
them off, he advanced toward their greatest fortress at Odawara.
The Hojo knew if Odawara was destroyed then they were finished. They
called in all their troops and followers from other castles to protect
it. 50,000 men assembled to defend their position.
The attackers had even more. 200,000 men clogged the roads and
surrounding countryside. Seeing an assault would be costly and futile,
they spent most of the siege starving out the defenders. While they
waited, the Samurai were entertained and grew vegetables until the
occupants of the castle surrendered.
Sekigahara, 1600
Hideyoshi’s death created a power vacuum. The situation was resolved at Sekigahara in 1600.
The 58-year-old commander Tokugawa Ieyasu was a lifelong samurai who
had survived a musket ball striking his armor earlier in life. He was a
cunning tactician. By threatening his opponents’ lines of communication,
he drew them into a fight on ground of his choosing. In a grueling
battle in mud and rain, the largest armies ever assembled in Japan
fought for control of the country. It was one of the last field battles
between samurai and Ieyasu emerged victorious, becoming shogun.
Tenno-Ji, 1615
The final field battle between samurai took place outside the walls
of Osaka in 1615. The great fortress had been under siege for months, as
Ieyasu tried to finish off resistance by his enemies. Trickery
eventually gave him an advantage and led to a huge battle outside its
defenses. Ieyasu took part in the fighting and was wounded by a spear
thrust. Despite his injury, he emerged triumphantly. Source: Stephen Turnbull (1987), Samurai Warriors
How 60 Coast Guard Cutters Saved Over 400 Men On D-Day
“0530,
accompanied invasion barges into shore under severe shelling attacks
and with mines going up all around us. 0730, LCF-31 hit by shell 800
yards off shore, sinking immediately. While engaged in picking up
survivors, a shell struck PC-1261, which disintegrated, scattering men
and debris over a wide area. While so engaged, shells and bullets were
falling nearby, and just after last man picked up, small landing craft
only few hundred yards off shore blew up. Proceeded to spot and picked up all living survivors.” (CGC-16 Log.)
This is how June 6th, 1944, began for the crew of CGC-16. They were
part of a group of US Coast Guard patrol boats assigned to the Invasion
of Normandy during World War 2. On paper, their mission was simple:
assist any allied ships in distress. In practice, though, it proved to
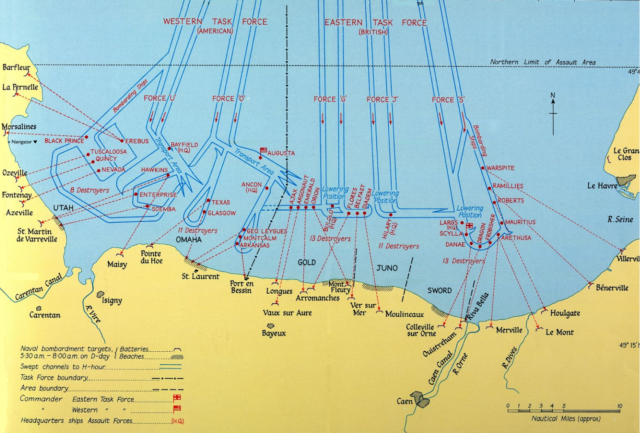
be anything but. A map showing the Naval Bombardments, and landing zones of D-day.The plan to have Coast Guardsmen
rescuing ships in the invasion originated only a matter of weeks
earlier. President Roosevelt requested that Admiral Ernest M. King,
chief of naval operations, create a small group of rescue ships to help
lower the casualty count at D-Day. Knowing the Coast Guard had the
experience and ships necessary, King then contacted the Coast Guard
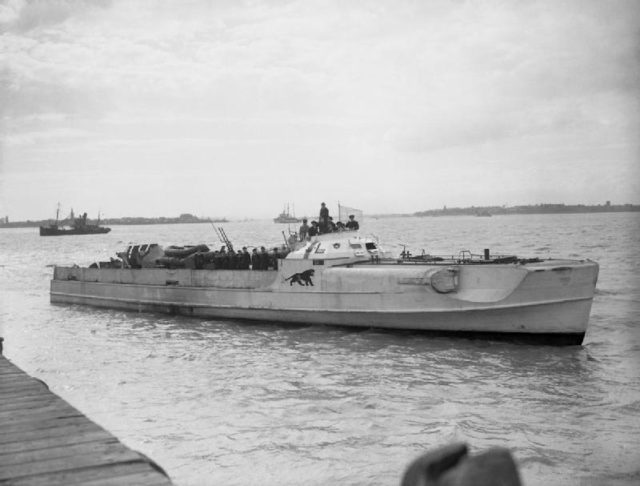
Commander, Vice Admiral Russell R. Waesche. Waesche selected the 83-foot cutters
of the “Matchbox Fleet”, small wooden ships used for antisubmarine
patrols off the coast. 60 of these small, lightly armored ships were
sent over to England to prepare for the invasion. A German “E-Boat” torpedo boat. Its similar appearance to the Coast Guard’s 83 foot cutters nearly cost the lives of 4 crews.From the very beginning of the
action, it was clear nothing would go according to plan. Most of the
cutters formed up with the rest of the fleet around 05:30 AM, often to a
mixed reception. While some troop ships simply told these small craft
to stay back out of the fire, HMS Hind almost
fired on four of them. There was a constant fear of German torpedo
boats hindering the invasion, and from a distance, the German and
American vessels looked similar. Other vessels, though, understood the
usefulness of the small ships and greeted them enthusiastically. And
despite the early SNAFUs, these ships proved their worth during the
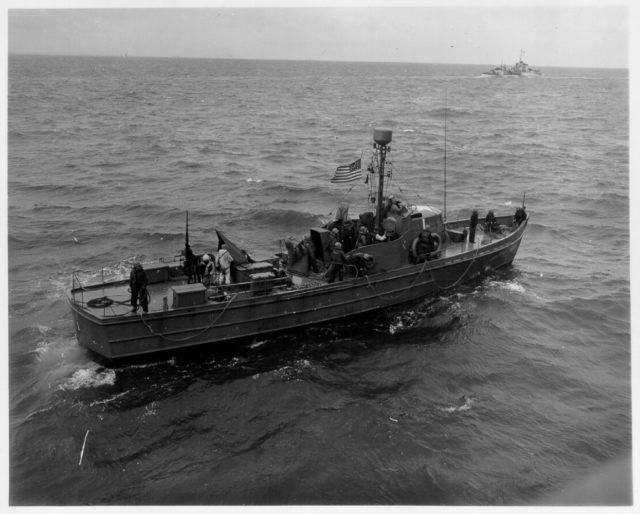
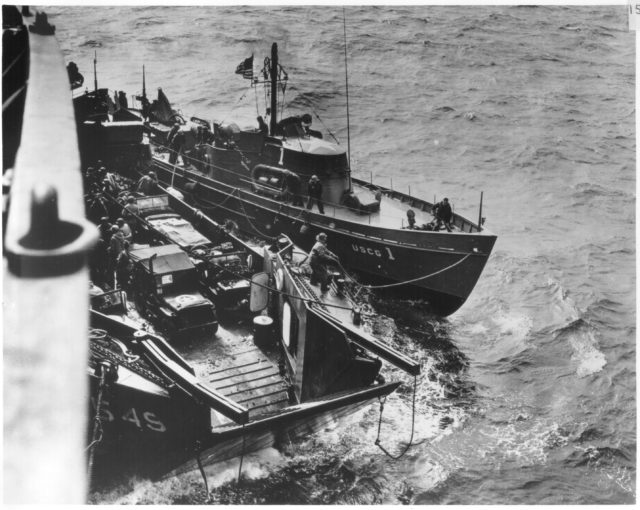
battle. Out of the 60 ships, three especially distinguished themselves. Photograph of CGC-1 During D-Day.CGC-1 is a clear example of the kind
of rescues these ships performed, and the dangers they faced. Attached
to the Omaha Beach Assault Sector, CGC-1 joined the force at 06:00 AM on
June 6th, just as the entire fleet began steaming towards the Nazi Atlantic Wall.
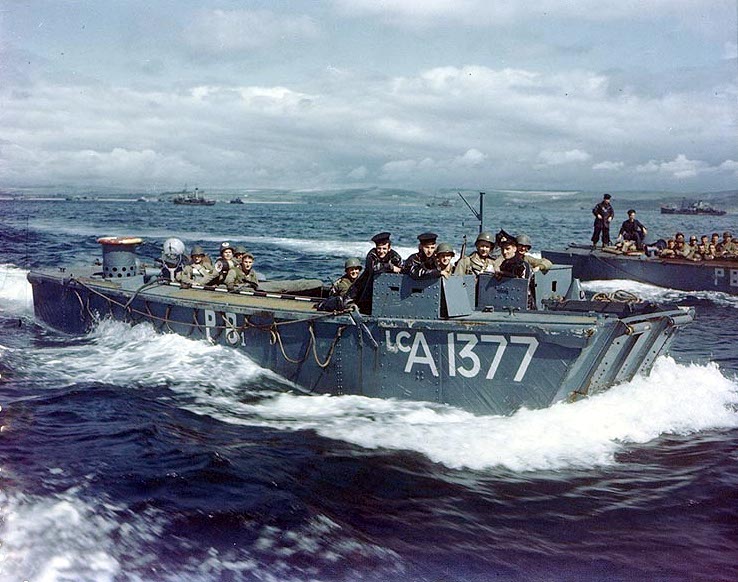
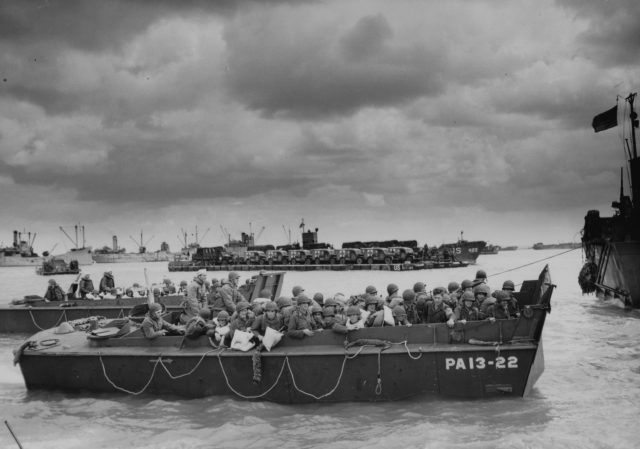
Its initial duty was to escort a group of LCVPs towards the beaches.
But two miles off the shore they spotted a sinking British LCA. The
cutter rushed to help, knowing that hypothermia could kill in minutes,
rather than hours. The British soldiers and sailors were already feeling
its effects and were too weak to climb up the side of the cutter.
Without a second thought, the Coast Guardsmen on board tied lines
about their waists and jumped into the freezing water. They pulled and
pushed the survivors up and on to the deck, saving 28 men in total. They
then sped back to get them medical attention at a waiting hospital
ship. But the freezing water wasn’t the only trouble these men faced. LCVPs preparing to hit the beaches during the invasion of Normandy.CGC-35 braved a burning sea to rescue
a British crew. They had found a burning LCT, full of fuel, oil, and
ammunition. The fuel had spilled out into the surrounding water, and
immediately went up in flames. The crew was sitting on a floating bomb,
trapped on all sides by flames licking up at the steel hull. Despite the
amazing risk, the small, WOODEN,
cutter drove into the flames, up to the side of the landing craft. To
add to the danger, the cutters had fuel tanks amidships, full of
high-grade gasoline. But thanks to the Coast Guardsmen’s
bravery, the British crew was able to exit their sinking vessel, and be
taken back to the safety of a hospital ship. For their actions that day,
the crew of CGC-35 was awarded the Distinguished Service Cross, by the
British First Lord of the Admiralty. While every ship had a harrowing
story that day, one truly stood above the rest. LCTs loading in England before D-Day.CGC-16, nicknamed “The Homing
Pigeon”, was the most successful rescue ship on D-Day. Her operational
day started at 05:30 AM on June 6th when she met with the rest of her
convoy group. They immediately joined the invasion force, as the entire
fleet sped towards the Normandy coast. CGC-16 was placed directly behind
the landing craft of the Red Beach at the Omaha Sector. The Germans had
placed mines, and underwater obstacles to slow the invasion, and these
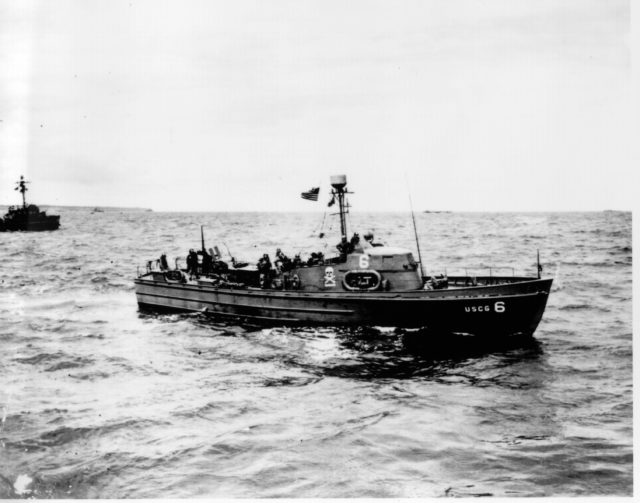
proved effective. CGC-6, notice the unauthorized skull and crossbones on the superstructure. It also appeared on the crew’s helmets.But while vessels had to worry what
was below them, they were also being shelled by the German shore
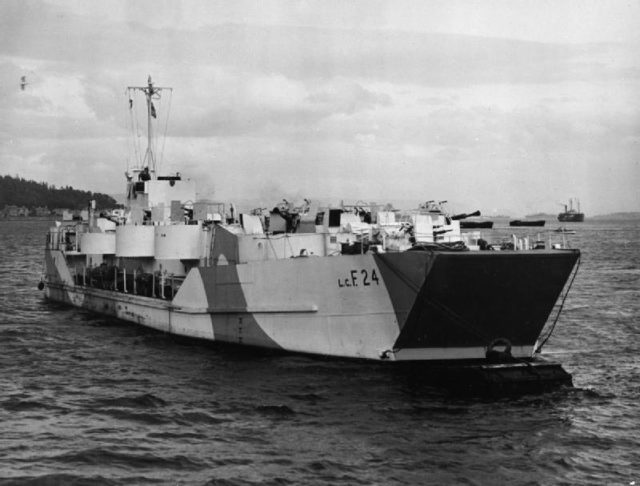
batteries ahead of them. One craft, LCF-31, an anti-aircraft boat was
hit by a German shell at 07:30 AM, less than half a mile off the shore.
CGC-16 immediately sped to her rescue. Once all men were off the LCF, a
173-foot patrol craft, PC-1261, was also hit. The small, 83-foot cutter
picked all 90 survivors out of the water, then head off to a hospital
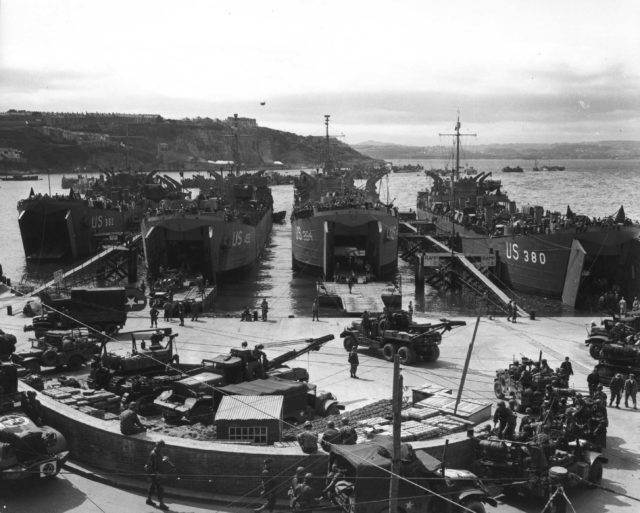
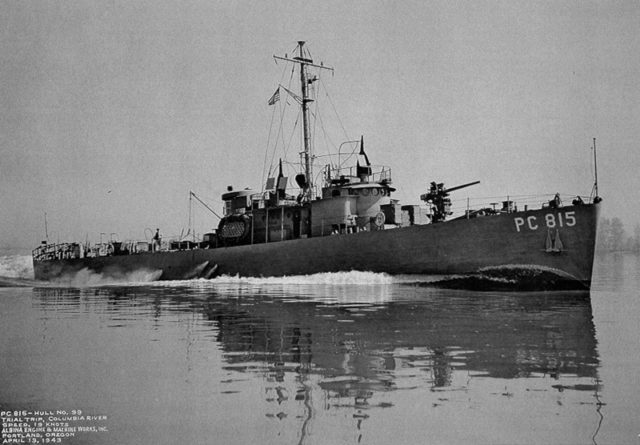
ship. An LCF (Landing Craft Flak), similar to LCF-31, which sank at D-Day.USS PC-815, in the same class as PC 1261.These cutters were never designed to
hold more than about 20 wound personnel, in addition to their 13-15 man
crew, but the often did so. In CGC-16, the men were crammed into every
available space, with weapons and wet clothing piled around the gun
mount on the bow and any wounded men unable to stand lying on the deck.
From the engine room to the crew quarters, there wasn’t an inch of
unused space. CGC-1 Tied up to an LCT, next to the Samual P. Chase, one of the hospital ships at D-Day.Once the cutter offloaded the 90 men,
she sped out to find more. Finding an LCT, sinking and on fire, the
Coast Guardsmen responded quickly. They knew that if the ammunition and
fuel on board were to catch fire, nearly everyone present, including
them, would be killed. They rescued all survivors they could find and
began pulling away. But one survivor told them there was a man still on
board, whose legs were badly injured. Coxswain Arthur Burkhard, Jr. tied
a line around his waist and made his way towards the LCT. They knew it
was only a matter of time before the fire reached the fuel and
ammunition, but the small cutter remained next to the transport. Burckhard found the wounded
man and picked him up. He brought him to the ship’s rail, but at this
point, the cutter had to back off, for fear of being crushed by the much
larger ship. Burckhard ran out of options, and threw the wounded man
off the side of the ship, diving in after him. They quickly got a line
under the wounded man’s arms and hauled him aboard. Just as Burckhard
and the last survivor were crawling back on the cutter, the transport
finally capsized, and sank; they made it off just in the nick of time.
CGC-16 sped back to the hospital ships and offloaded her wounded. By
the end of the day on June 6th, 1944, the 15 man crew of CGC-16 had
saved 126 souls, more than any other ship present that day. For their
bravery, the entire crew, which included a war correspondent, was
awarded the Bronze Star. By the end of operations on D-Day, Rescue Flotilla 1 had saved over 400 of the soldiers from the stormy sea. They were eventually disbanded in December 1944, after saving a grand total of 1,483 souls.
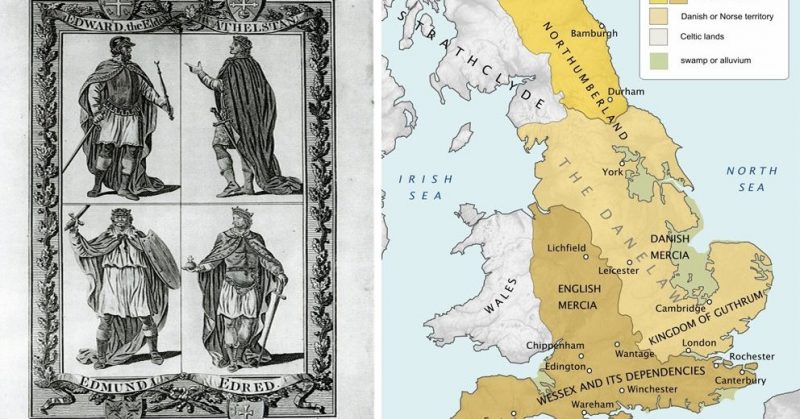
Four Men and One Woman – Five Mighty Leaders Whose Wars United Medieval England
In
the late ninth century, England was not a united country. Viking
raiders from Denmark controlled the north and east. Norwegian and Irish
raids left communities fractured. Separate English kingdoms struggled to
retain their power in the face of threats from outside, and internal
power struggles.
The country was united not by peaceful negotiation but by the wars of a series of strong rulers.
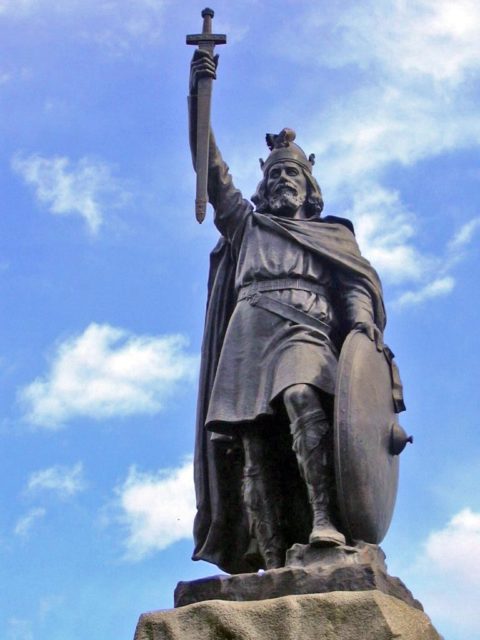
Alfred the Great
When the Vikings invaded England in force in the 860s and 870s, only
one ruler stood successfully against them – King Alfred of Wessex, known
to history as Alfred the Great.
The Vikings tore through the rest of the country and even brought
large swathes of Wessex under their command. Forced to go on the run,
Alfred gathered his forces for a desperate fight back. Achieving the
first substantial successes against the invaders at Englefield and
Ashdown in 871, he drove them back through years of campaigning. Statue of Alfred the Great at Winchester. Photo Credit
Alfred’s other great military achievement was making Wessex
defensible. For years, English settlements had lacked the defenses to
protect them against raiders. Alfred created a system of burghs,
fortified towns that could provide defensive strong points, retaining
control of territory and giving people a safe place to retreat to. He
created feudal obligations for people to help build and maintain these
defenses, to ensure they stayed in place.
Critically, Alfred was so powerful that King Aethelred of Mercia
acknowledged him as overlord. This turned the two largest power blocks
in the country into a single whole, with the Viking lands of the north
and east as their main opponent.
Edward the Elder
By the time Alfred’s son Edward, known as “the Elder,” came to the
throne in 899, he was an experienced Viking fighter, having led armies
during his father’s time. He defeated an attempt to take his throne by
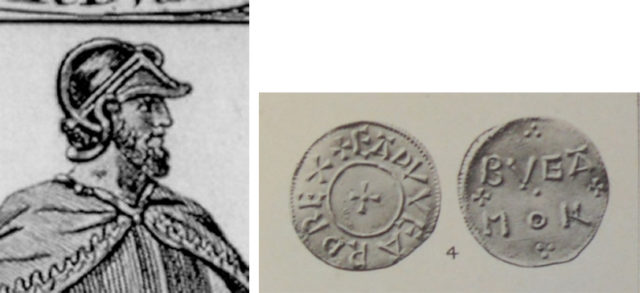
his cousin Aethelwold, who was backed by the Vikings. King Edward the Elder and his coin.
From 909, Edward went on the offensive, beginning years of complex
warfare. Raids and counter-raids went back and forth across the border.
Edward drove back Viking invaders, breaking the strength of the York
Danes at Tettenhall in 910. He advanced into Viking lands, punishing his
opponents for their attacks and gradually eating away at their
territory through the submission of towns such as Nottingham and
Stamford.
Like his father before him, Edward used fortifications to consolidate
his conquests. Some were taken from the Danes, while others were built
from scratch, defensive earthworks taking about a month to construct.
They were garrisoned by landowners called thegns, who were responsible
for bringing their retainers as troops.
Aethelred’s wife and successor, Aethelfled, died in 918. By then,
Edward held such a position of power that Mercia became his, officially
uniting it with Wessex.
Aethelfled
Aethelfled was an important war leader and ruler in her own right.
Alfred’s daughter and Edward’s sister, her marriage to Aethelred of
Mercia helped forge bonds between that kingdom and Wessex. But it was
when her husband died in 911 that Aethelfled showed what she was really capable of, taking control of his kingdom and his armies. Aethelfled as depicted in the thirteenth-century cartulary of Abingdon Abbey.
From 914, Aethelfled joined with her brother in launching offensives
against their enemies across England. While he focused on the Danish
invaders and settlers of the southeast and Midlands, she concentrated on
the Welsh and Norse in the north and west. Her interventions prevented
the Vikings from uniting to fight Edward, allowing a strategy of divide
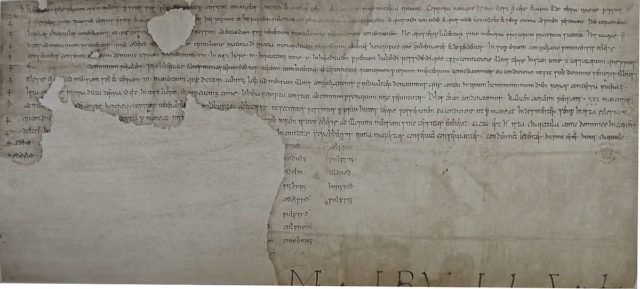
and conquer. Charter
S 221, dated 901, of Æthelred and Ætheflæd, rulers of the Mercians
photographed by Dudley Miles from E A Bond, Facsimiles of Ancient
Charters in the British Museum, Part III, 1877.
Aethelfled conquered Leicester in 918, after which the
Kingdom of York came to her in search of aid against attacks from
Norwegian forces out of Dublin. She had become a recognized power in her
own right, and this set up the later absorption of York.
Aethelfled died in June 918, leaving Mercia to her brother and uniting the kingdoms.
Athelstan
When Edward died in 924, his son Athelstan came to the throne.
Together with his brothers Edmund and Eadred, he focussed on
consolidating territory in the south, while having more mixed
experiences in the north. The tomb of King Athelstan in Malmesbury Abbey, Malmesbury, England.
From 927 to 934, Athelstan controlled Northumbria, the most northerly
part of England. This stirred up conflict with all the other powers
interested in that region. A peace agreement made in 927 with Scotland
and Strathclyde quickly fell apart. In 934, Athelstan gathered an army
that included Welsh and Danish forces and marched north, raiding almost
as far as Aberdeen in a great display of power.
In response, Scotland and Strathclyde banded together with the Dublin
Norwegians to invade Athelstan’s kingdom in 937. Their army was
defeated by Athelstan at the Battle of Brunanburh. Little is known about
this important battle, and even its location remains a mystery.
Edmund
The reign of Athelstan’s half-brother Edmund did not start well.
Athelstan’s death in 939 created an opportunity for Olaf of Dublin, who
attacked northern Mercia and seized the Kingdom of York. Unable to deal
with this threat militarily, Edmund bought peace by handing over the
Five Boroughs, a large swathe of territory that included the towns of
Nottingham, Lincoln, and Derby.
Soon after, Olaf himself died, providing Edmund with the opportunity
he needed. He retook the Five Boroughs in 942 and York in 944. These
conquests were followed by an invasion of Strathclyde in 945, about
which little information remains. Strathclyde would never fall to the
English, instead being swallowed up by its neighbor to the northeast,
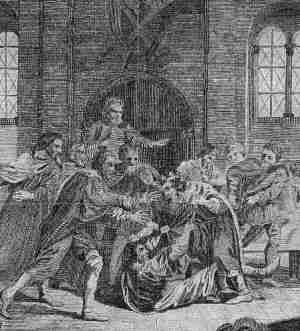
the Kingdom of Scotland. The murder of King Edmund I at Pucklechurch in 946.
Edmund did not rule for long, dying in 946. But he left England
united, its territory mostly as it would maintain for the next thousand
years and more. York was briefly retaken by Vikings under King Eric
Bloodaxe in 948 but retaken in 954. Across the rest of the country,
fortifications modeled after those of Alfred the Great consolidated the
country, preventing raiders from taking control.
Though the unification of England involved famous pitched battles, it
was this process of fortification, combined with slow and steady
advances, which allowed the nation to be united by military might.
The Four Worst Mistakes Of The Axis Powers During WWII
Looking
back at WWII there have been four decisions made that, in the end, did
not work out to the Axis advantage. Of course, you can argue that
starting the war in the first place was the biggest mistake made. But,
for the sake of the argument, let us look at four mistakes that were
made after the war was started.
Nazi Alliance with Fascist Italy
Mussolini and Hitler in the heady days of 1940. The photo was taken by Eva Braun, and is in the public domain.Having
allied themselves with Italy, although ideologically similar, was
something that the Nazis should not have done. Time and again the Nazis
were forced to come to the aid of Italy after the fascists launched an
ill-conceived invasion or bit off more than they could chew.
Getting the German forces involved in North Africa, a costly
commitment, was bad enough, but the forced German invasion of Greece
could not have come at a worse time.
In March of 1941 Mussolini, the Fascist dictator of Italy, was
still angry with Hitler after he failed to inform the Italians
beforehand of his plans to invade France and the Low countries. This
made Mussolini decide he was going to surprise Hitler and invade Greece
without telling him. The Italian advance quickly bogged down and after a
few weeks, the Greeks had fought them back to their starting point. The
British came to the aid of the Greeks and landed forces in what
Churchill called the soft underbelly of Europe.
This loss of face for the Axis powers could not be accepted by
Hitler, who ordered his generals to come up with a plan to secure his,
now vulnerable, southern flank. This meant that the Invasion of the
Soviet Union, which was supposed to start in early spring, had to
be postponed to June 22nd. As it turned out, this delay proved fatal.
Nazi invasion of Russia
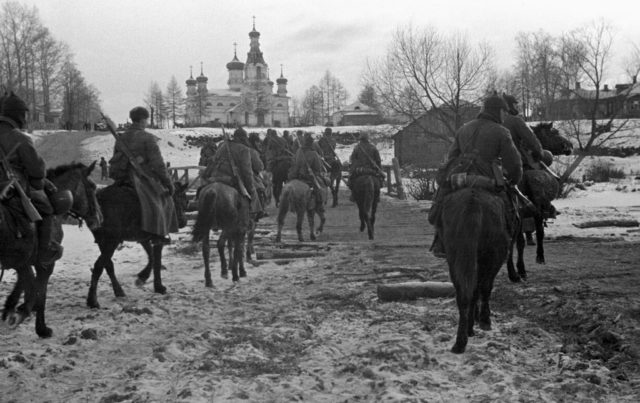
Russian Cavalry Entering a liberated town. Photo Credit
Even though it was inconceivable that Nazis would not invade the
Soviet Union, so was the Molotov-Ribbentrop pact which they signed on
August 13th, 1939. This non-aggression pact allowed Nazi Germany to
invade Poland without having to worry about a possible war with the
USSR.
It even went so far that Poland was divided between the two and the
part that the Soviets took in September 1939 has never been returned to
Poland. It also gave the Soviets free reign in expanding their influence
in the Eastern European countries and they lost no time in
subjecting them to their rule.
The fact that the two sworn ideological enemies were willing to sign a
non-aggression pact shook the world and allowed Nazi Germany the time
to focus its attention on the western Europe without having to fear a
war on two fronts. Germany made the most of this freedom and, in quick
succession, defeated Denmark, Norway, The Netherlands, Belgium, and
France.
Only their planned invasion of the United Kingdom was thwarted by the
Few of the Royal Air Force, the first setback for the Nazis.
Deteriorating weather caused the invasion of Britain to be postponed
indefinitely, and Hitler once more turned to the East where, according
to his book Mein Kampf, he believed the “Lebensraum” (living space) was
which the Germans needed above all other things. However, this living
space was occupied by the Russians. Russia had now moved its western
borders hundreds of kilometers closer to Nazi Germany as a result of the
pact.
Unable to knock Britain out of the war first and thus faced with a war on two fronts, which he had vowed to avoid at all costs, Hitler invaded
the Soviet Union. Hitler was confident the Soviet Union would be
defeated in mere weeks, and he is quoted as having said: “We have only
to kick in the door, and the whole rotten structure will come crashing
down.”
However, most of the first month, if not six weeks, was spent
fighting a way through countries now occupied by the Soviet Union. These
countries might otherwise have been ensnared into the Axis camp, had it
not been for the pact.
The extra territory gave the Soviets the ability to trade space for
time and, with the extra delay caused by the invasion of Greece, meant
that Nazi Germany could not complete its conquest during the remaining
period of good weather. The autumn rains rolled in and turned most of
Russia in a quagmire of mud which made all movement virtually
impossible. Then Winter arrived early, with extreme cold for which the
Germans were not equipped.
Attack on Pearl Harbor
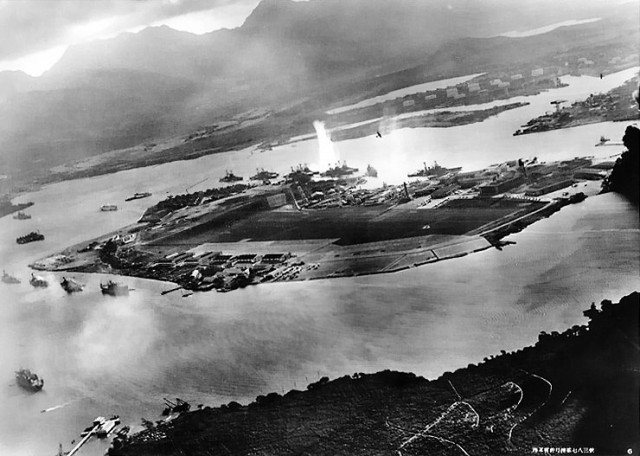
The
photograph was taken from a Japanese plane during the torpedo attack on
ships moored on both sides of Ford Island shortly after the beginning
of the Pearl Harbor attack.
In a history similar to the German attack on the Soviet Union, the
Japanese wanted an empire of their own to secure the future prosperity
of a country which they thought did not have enough natural resources to
sustain the population. The Germans called it “Lebensraum,” the
Japanese called it the “Greater East Asia Co-Prosperity Sphere.” It
amounted to the same thing.
Having occupied vast portions of China and some countries in East
Asia the next step was to expand its empire east into the Pacific ocean.
Their eye was on the prosperous and natural resources that were under
the control of the British and Dutch empires and the American-governed
Philippines. However attacking these would cause the United States to
join the war on the side of the allies.
America, on the other hand, had kept an eye on Japanese conquests and
brutality and, short of war, did what they could to restrict them. In
July 1941 they embargoed the export of oil to Japan which then
calculated that, without acquiring the oil in the Dutch East Indies,
they only had enough fuel for two years. They reasoned that now there
would be no other option than going to war.
Realizing that they could not defeat the USA in direct battle, they
chose to deliver a crushing blow to the American fleet based at Pearl
Harbor. This would give them time to complete their desired conquests
and present the Americans with a “fait accompli.” They reasoned the
Americans would not be willing to enter a protracted war with Japan, and
they would be able to make peace, keeping their vital conquests and
handing back the less desirable places.
Fate, or bad Japanese intelligence, intervened on the Allied side on
December 7th, 1941 and the vital American Aircraft carriers were not in
port when the Japanese struck Pearl Harbor. This meant the Americans
were able to fight back causing the Japanese Admiral in charge of the
attack to say (supposedly) “I fear all we have done is to awaken a
sleeping giant and fill him with a terrible resolve.”.
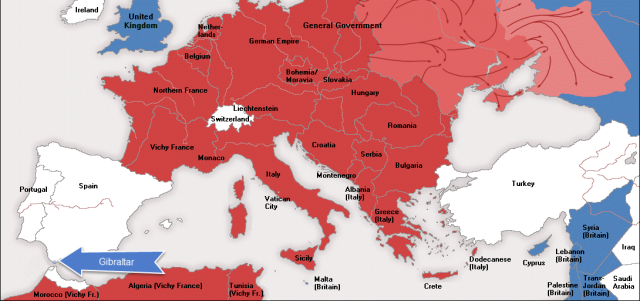
No alliance between the Nazis, Spain, and Turkey
Photo Credit
One look at the map of Europe will show the strategic importance of
both Spain and Turkey. However, these two were two of the few countries
on the European mainland that remained neutral during the second world
war.
Even though Spain remained neutral during the First World War, it was
expected they would come in on the side of the Axis after all the help
Hitler had given General Franco in the Spanish Civil War. However,
despite pleading and perhaps even begging, Franco remained adamant. He
would not join the Axis and would not even allow the Germans to pass
through his country (as the Swedes did).
Not being able to pass through Spain meant that Great Britain was
secure in using its military base in Gibraltar. Not only did this
effectively seal off the entrance to the Mediterranean from Atlantic
ocean for the German Navy, but it also gave the British a location from
which it could support Malta and Egypt. Possession of Malta meant the
British could interdict shipping from Italy to North Africa. Possession
of Egypt meant it could stop the Axis from linking up with their forces
fighting in the Caucasus (Soviet Union) and taking the much-needed oil
fields in the middle east.
Turkey fought on the side of the Axis in the First World War yet
declined to join them in the Second. This, again, meant the Germans
could not link up with their forces in the Caucasus making the capture
of Egypt paramount. In February 1945, Turkey joined the Allies and
declared war on a virtually defeated Nazi Germany.
Amazing Story Of Heroism – JFK Was Awarded The Navy and Marine Corps Medal In WWII (Watch)
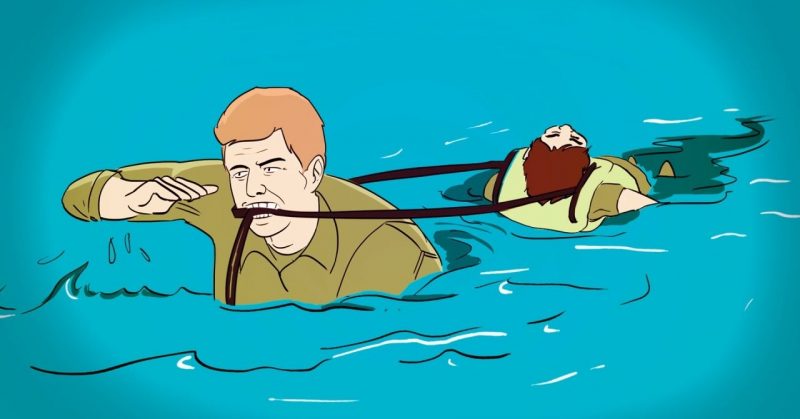
On
a dark night in August of 1943, young Jack Kennedy is cruising silently
through the waters of the South Pacific near the Solomon Islands on a
PT-109, a small boat only 80 feet long. He and his 11 man crew are
trying to avoid detection. When the PT is torn in half by a 300-foot
Japanese destroyer, it is all too clear that they succeeded.
Ten of the men go overboard, two have died on impact. The remaining
men are caught in the chaos of trying to keep their heads above water in
a turbulent wake filled with the wreckage of their destroyed torpedo
boat. One man is so badly burnt that he cannot swim.
Our future president becomes a hero on that night. He takes the
straps of the injured man’s lifejacket into his teeth and drags him
three miles to the nearest shore.
Imagine how tempting it must have been to give up. Saltwater in his
eyes, the dead weight of another soldier pressing against his teeth,
trying to breathe and swim at the same time without the use of his
mouth. A harrowing rescue indeed.
The story told in this video by the American Heroes Channel is
recounted in detail, including what happens when they reach the shore.
ROLAND SAN JUAN was a researcher, management consultant, inventor, a part time radio broadcaster and a publishing director. He died last November 25, 2008 after suffering a stroke. His staff will continue his unfinished work to inform the world of the untold truths. Please read Erick San Juan's articles at: ericksanjuan.blogspot.com This blog is dedicated to the late Max Soliven, a FILIPINO PATRIOT.
DISCLAIMER - We do not own or claim any rights to the articles presented in this blog. They are for information and reference only for whatever it's worth. They are copyrighted to their rightful owners.
************************************
Please listen in to Erick San Juan's daily radio program which is aired through DWSS 1494khz AM @ 5:30pm, Mondays through Fridays, R.P. time, with broadcast title, “WHISTLEBLOWER” the broadcast tackle current issues, breaking news, commentaries and analyses of various events of political and social significance.
***************************************
LIVE STREAMING
http://www.dwss-am1494khz.blogspot.com


![Hitler_and_Mussolini_June_1940-595x445 . <a href="https://en.wikipedia.org/wiki/File:Hitler_and_Mussolini_June_1940.jpg">[via]</a>](http://www.warhistoryonline.com/wp-content/uploads/2015/09/Hitler_and_Mussolini_June_1940-595x445.jpeg)
No comments:
Post a Comment